![]()
I love making gifts. They’re cost-effective and it’s satisfying to know that you’re giving a true gift-from-the-heart. In the beginning of July, I made a monogrammed hooded towel and washcloth set for my friend’s daughter. I made the hooded towel out of an adult-sized towel and a hand towel. The tutorial for the hooded towel can be found at Make and Takes. My tutorial shows how to make the monogram for the towel. This same technique can be applied to T-shirts, bags, and other clothing. It’s one of my favorite ways to customize an otherwise plain item. You don’t have to use letters, either. Using this technique, I’ve made appliques for my daughter’s tropical quilt, a robot walking a poodle for both girls’ poodle skirts, and even a customized Snuggie!
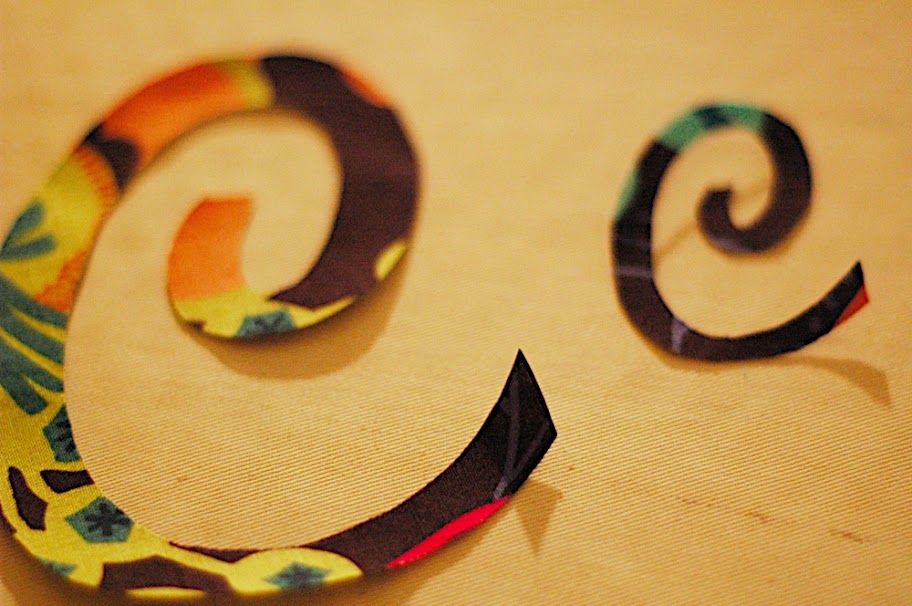
Again, I apologize for the photos. This was the first day I borrowed a different lens and I was testing it out in VERY low light.
Supplies:
- The item to be customized
- Printer
- Iron-on Adhesive (like Heat n’ Bond)
- Fabric for the graphic
- Good scissors
- Iron
- Pen
- Sewing Machine w/zigzag stitch
- Fabric stabilizer*
*You will need this if you’d like to zig-zag stitch the design and if the fabric you’d like to customize isn’t sturdy enough. The towel didn’t need a stabilizer but T-shirts definitely need this. There are many different types of stabilizers, here’s a great article with a chart from Threads Magazine that will help you choose which ones would work for your application: Making Sense of Stabilizers.
Step 1:
Print a mirrored image of the shape you want to transfer. The more contrast between the main image and background, the better. In this case, I made outlines of the letter “C” and flipped it. (I don’t like to be wasteful, so I printed this on the back of an old flyer.)

Step 2:
Cut the iron-on adhesive to be a little larger than your image and trace the art onto the paper-side of the adhesive.

Step 3:
Place the adhesive sheet on top of the WRONG SIDE of the fabric, paper-side up, and iron it until it adheres. Use the instructions that come with the adhesive sheet for the proper settings. I used Heat N’ Bond. Below is a photo of the instruction sheet that was wrapped around it.


Step 4:
Cut out your outline and peel the paper backing off. You will now have a “shiny” side on the back of the fabric.

Step 5:
Position the fabric onto the item you want to customize and iron it on.

From here, you can either leave it or go to Step 6. If you leave it, you’ll risk it peeling off after quite a few washes but I’ve had some items last a while.
Step 6:
If you need to use a fabric stabilizer, pin it to the back of the item so that it doesn’t shift (4 sides should suffice). Using your sewing machine, zig-zag the edge of the ironed on graphic. It’s best to not go beyond the edge of the iron-on. It would also look adorable with a blanket stitch, either hand-sewn or machined.

Easy enough? The hardest and most time-consuming part would be the zig-zag stitch. But once you get the hang of it, it’s relatively painless to do. Practice on some scrap fabric if you haven’t done this before.
I regret that I didn’t take a photo of the finished project. Before I knew it, I was wrapping up the gift and leaving for the party. Because my letters were so thin, I wanted to add more to the towel to show off the pattern of the fabric. Using the same fabric as the monogram, I made trim for the edges of the hood, towel, and washcloth. It was adorable—I almost wanted to keep it for myself, except my name doesn’t start with a “C.”
Have fun customizing your shirts, bags, towels, and whatever else you can think of!!