Yes, I’m on a blogging spree today. I just downloaded a bunch of photos off of our camera and I need to do something with them before I forget about them.
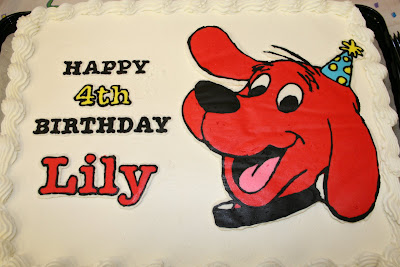
I’m part of a local online message board and one lady named Leslie asked if we knew of anyone who would make Clifford cakes in a small time frame. Apparently, Clifford items and cakes are hard to come by. Due to character rights, bakeries are prohibited to reproduce them. So as a favor I volunteered to help her out with her daughter’s cake. I would purchase a plain cake and add the decor.
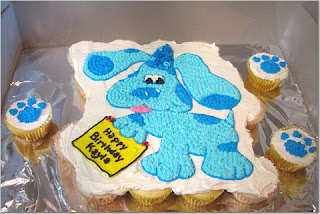
 In the past, I’ve freehanded a Blue’s Clues cake for my friend’s daughter’s birthday. It was a pull-apart cupcake cake that was quite easy and fun to do. I did a star-tip decoration which I was quite familiar with. She was thrilled when she saw the cake.
So when I volunteered my services, I thought that I would do the same with Clifford. Leslie sent me a few photos of other cakes and I did some research as well. From what I’ve seen there weren’t any star-tip decorated Clifford cakes and I wanted to try something new. I remembered seeing a technique for frozen transfers and I thought this would be a perfect time to try it out. Luckily, Leslie granted me permission to “experiment away.”
Frozen transfers need buttery buttercream icing to be more effective. A lot of buttercream icings use an equal amount of shortening to butter and apparently, this just won’t cut it for this technique – I guess it doesn’t freeze as hard as you need it to.
Here’s the recipe I used:
Buttercream Icing
3 sticks of butter at room temperature
1 cup shortening
2 tsp vanilla
2 lbs confectioner’s sugar, sifted
Using a paddle attachment, beat butter and shortening until well combined. Add vanilla and beat well. Turn the mixer down to low and gradually add the confectioner’s sugar until well combined. Beat on medium-high until smooth.
Black icing
You know how when you eat black icing, it gets all over your teeth and looks just horrible? Well I found out about a smart technique that reduces the mess-factor. To make a true black icing on buttercream requires A LOT of black icing gel paste. But this one is much easier and saves your black gel paste.
STEP 1
:
Print out a reverse image of what you want to make and tape it onto a flat surface that will fit in the freezer. I used cookie sheets.Tape a piece of wax paper on top of the image. I used parchment but should have used wax paper because some of the moisture seeped through the parchment and slightly wrinkled the image.
STEP 2:
Pipe the outline of the image. Start with the intricate areas first.
STEP 3:
Fill in the areas in the reverse order. For example, Clifford’s eyes, tongue and the dots on the hat will be on the “top.” Blue will lay over the hat and red will lay over on the rest of Clifford.
Pick up the wax paper and view the photo from underneath to reduce the icing gaps. If there are gaps smooth them over with a small offset spatula.
STEP 4:
Cover with white buttercream (or whatever color your cake is). Why do this? Because all the layers can be seen from the side when placed on the cake. So I outlined Clifford as well as the letters with white buttercream and spread an even layer over the whole image to even everything out.
Freeze for 90 minutes
Position image on cake and lightly press into cake. Slowly peel off the wax paper and voila – You have a pretty darn cool image on your cake!

Thom asked if they would be able to cut through the image and the answer is YES! The buttercream softens to it’s normal consistency and acts just as if you decorated the cake by freehand!
I like this technique and I think I will be doing this quite often or whenever I get a chance to do it. Note to self: next time, use wax paper.
I could get used to decorating plain store-bought cakes. It’s less mess in the kitchen and less time baking!

Really cool technique. You could copy any photo or graphic.
I love reading your blog, Melissa and enjoy seeing your work. It looks so fun! Thank you for sharing. I look forward to seeing more! Hugs and kisses to your beautiful family!
Could you make this ahead and freeze it longer? I am going to try making a Snow White one, and if the experiment goes well, it would be nice to just freeze it and not have to make it again!